I built a sous vide cooker, driven by a PWM/PID controller written in Erlang.
Then I gave a talk about it (and some other related temperature control that I've done) at a Raspberry Pi meetup.
I built a sous vide cooker, driven by a PWM/PID controller written in Erlang.
Then I gave a talk about it (and some other related temperature control that I've done) at a Raspberry Pi meetup.
When I ordered my Pi Zero W with a no-IR-filter camera, I also ordered a single infrared LED. This was enough to prove that I could illuminate things with IR, but not really good enough for more than a small dot of light.
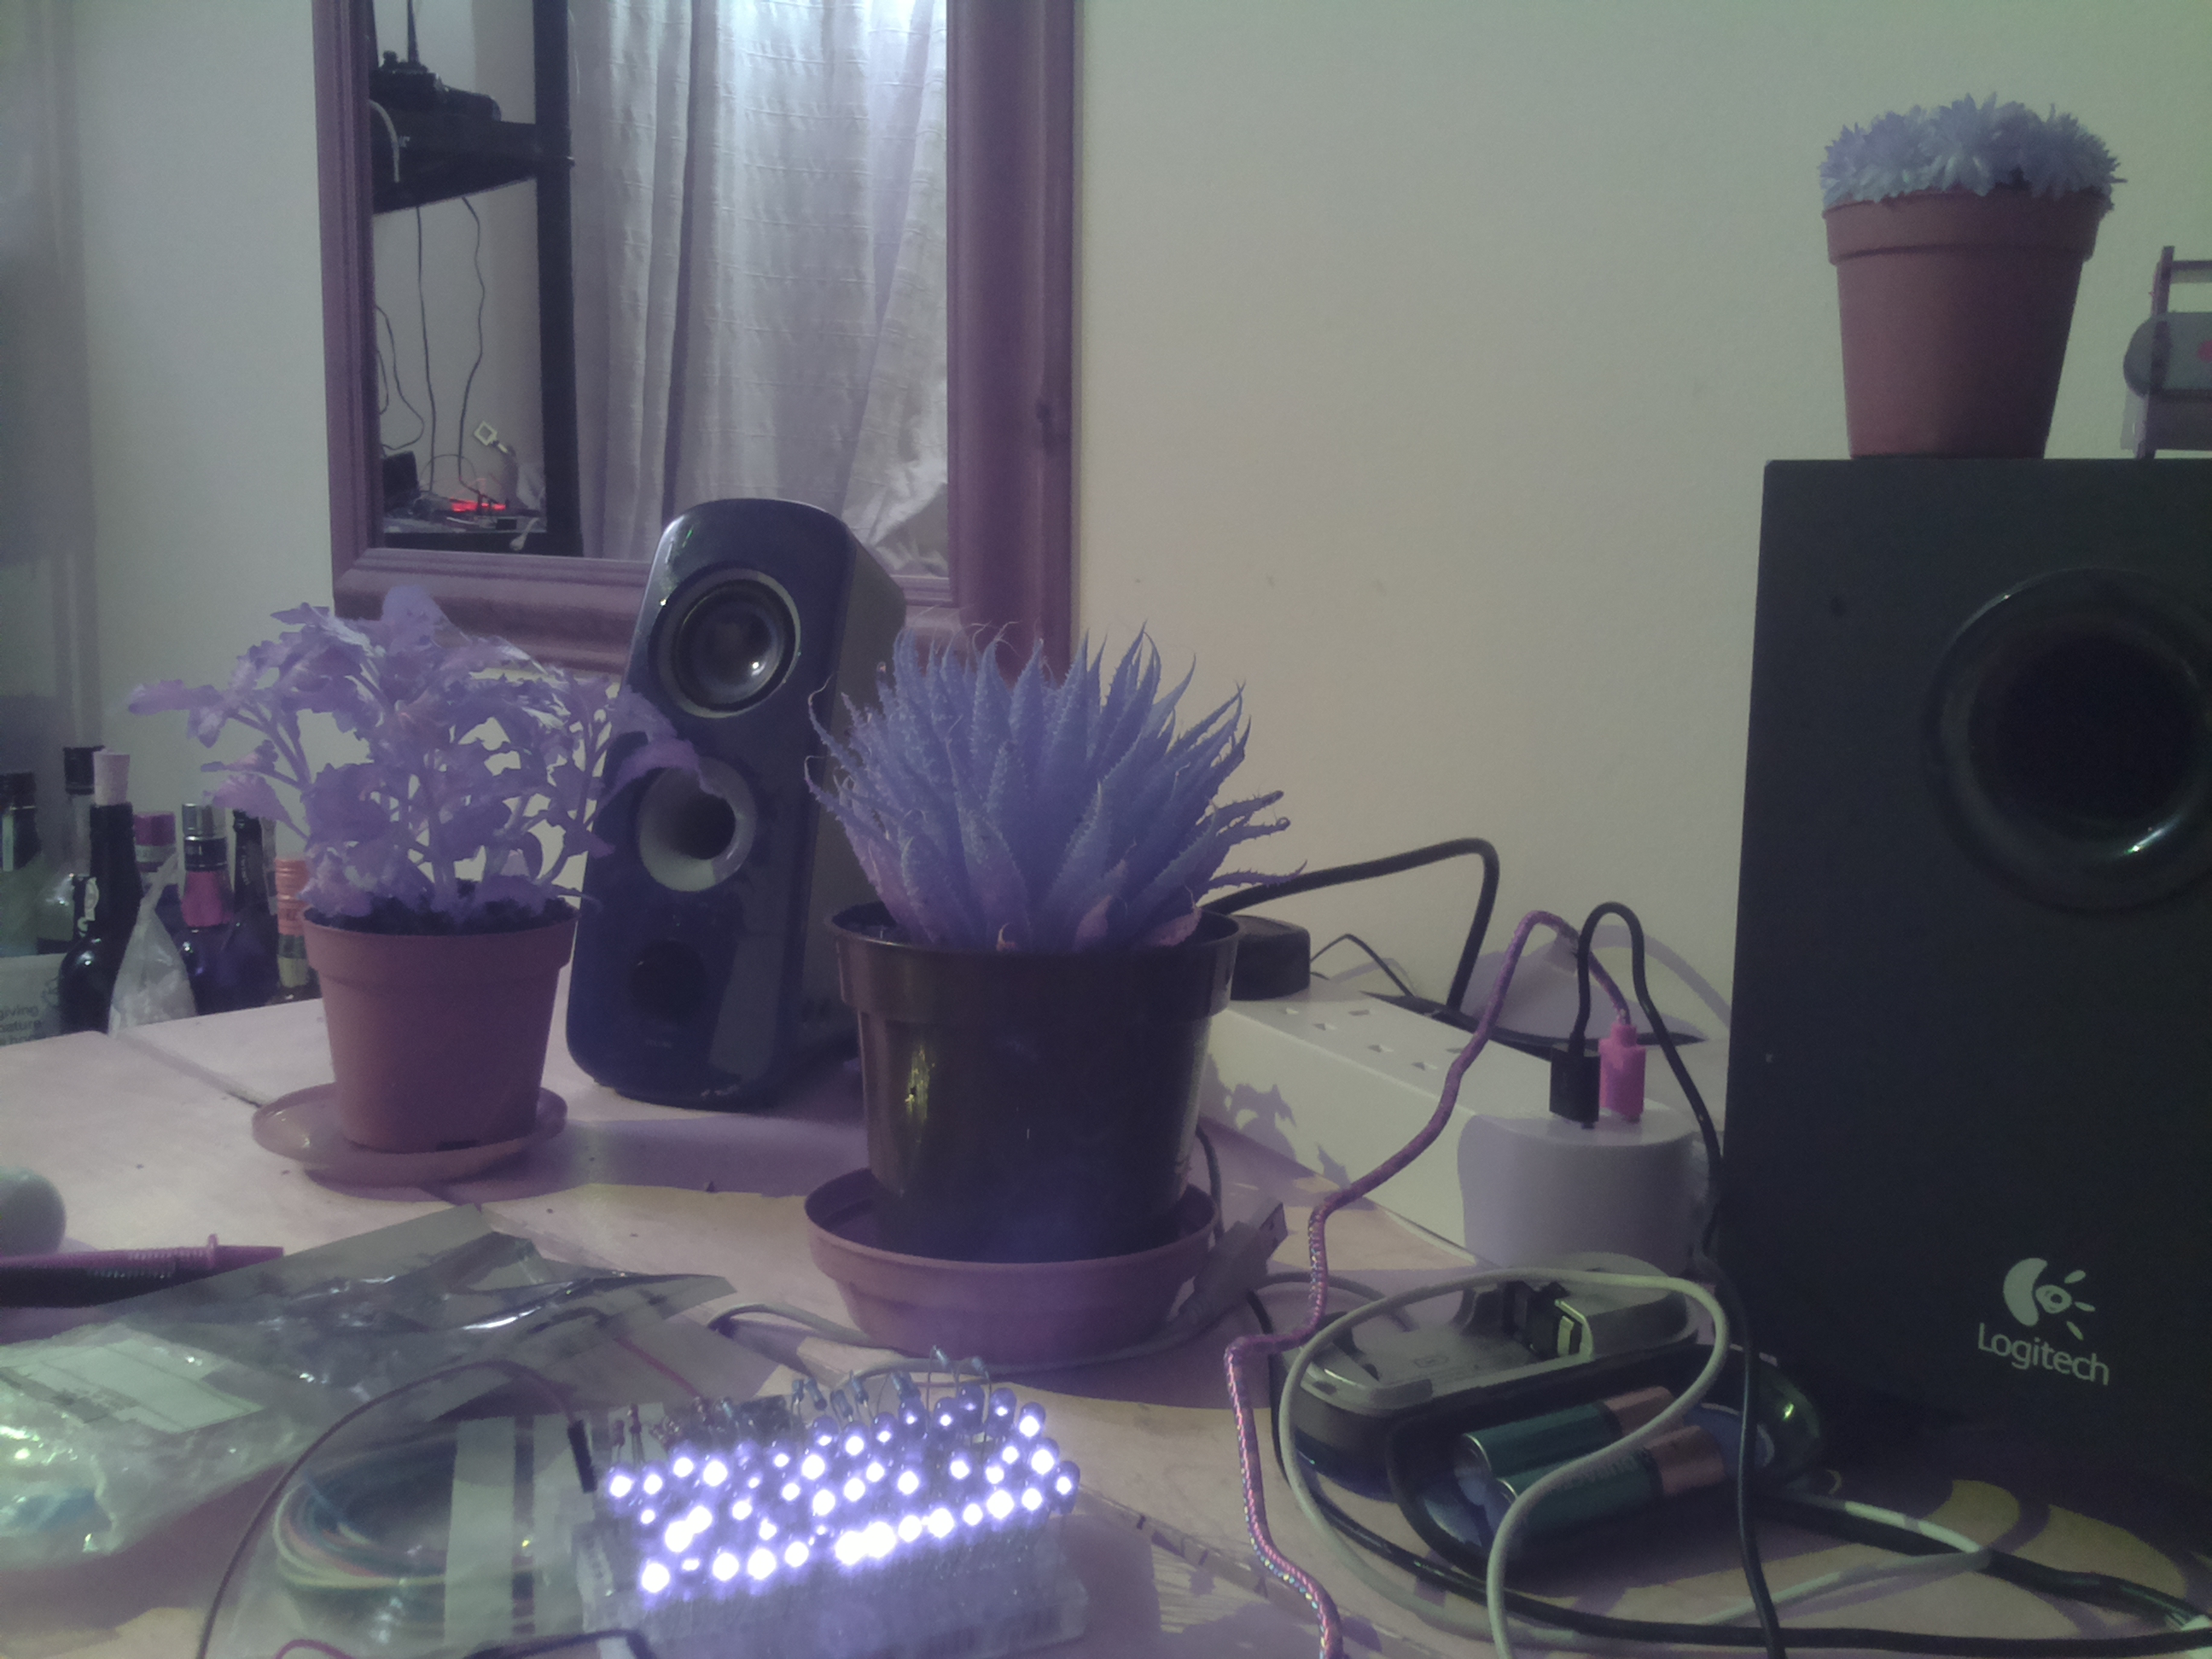
So, then I ordered 50 x £0.04 infrared LEDs from RS (which arrived overnight!) and wired them up yesterday onto a single breadboard powered by a regular USB 5v power supply. You can see the layout in the first picture.
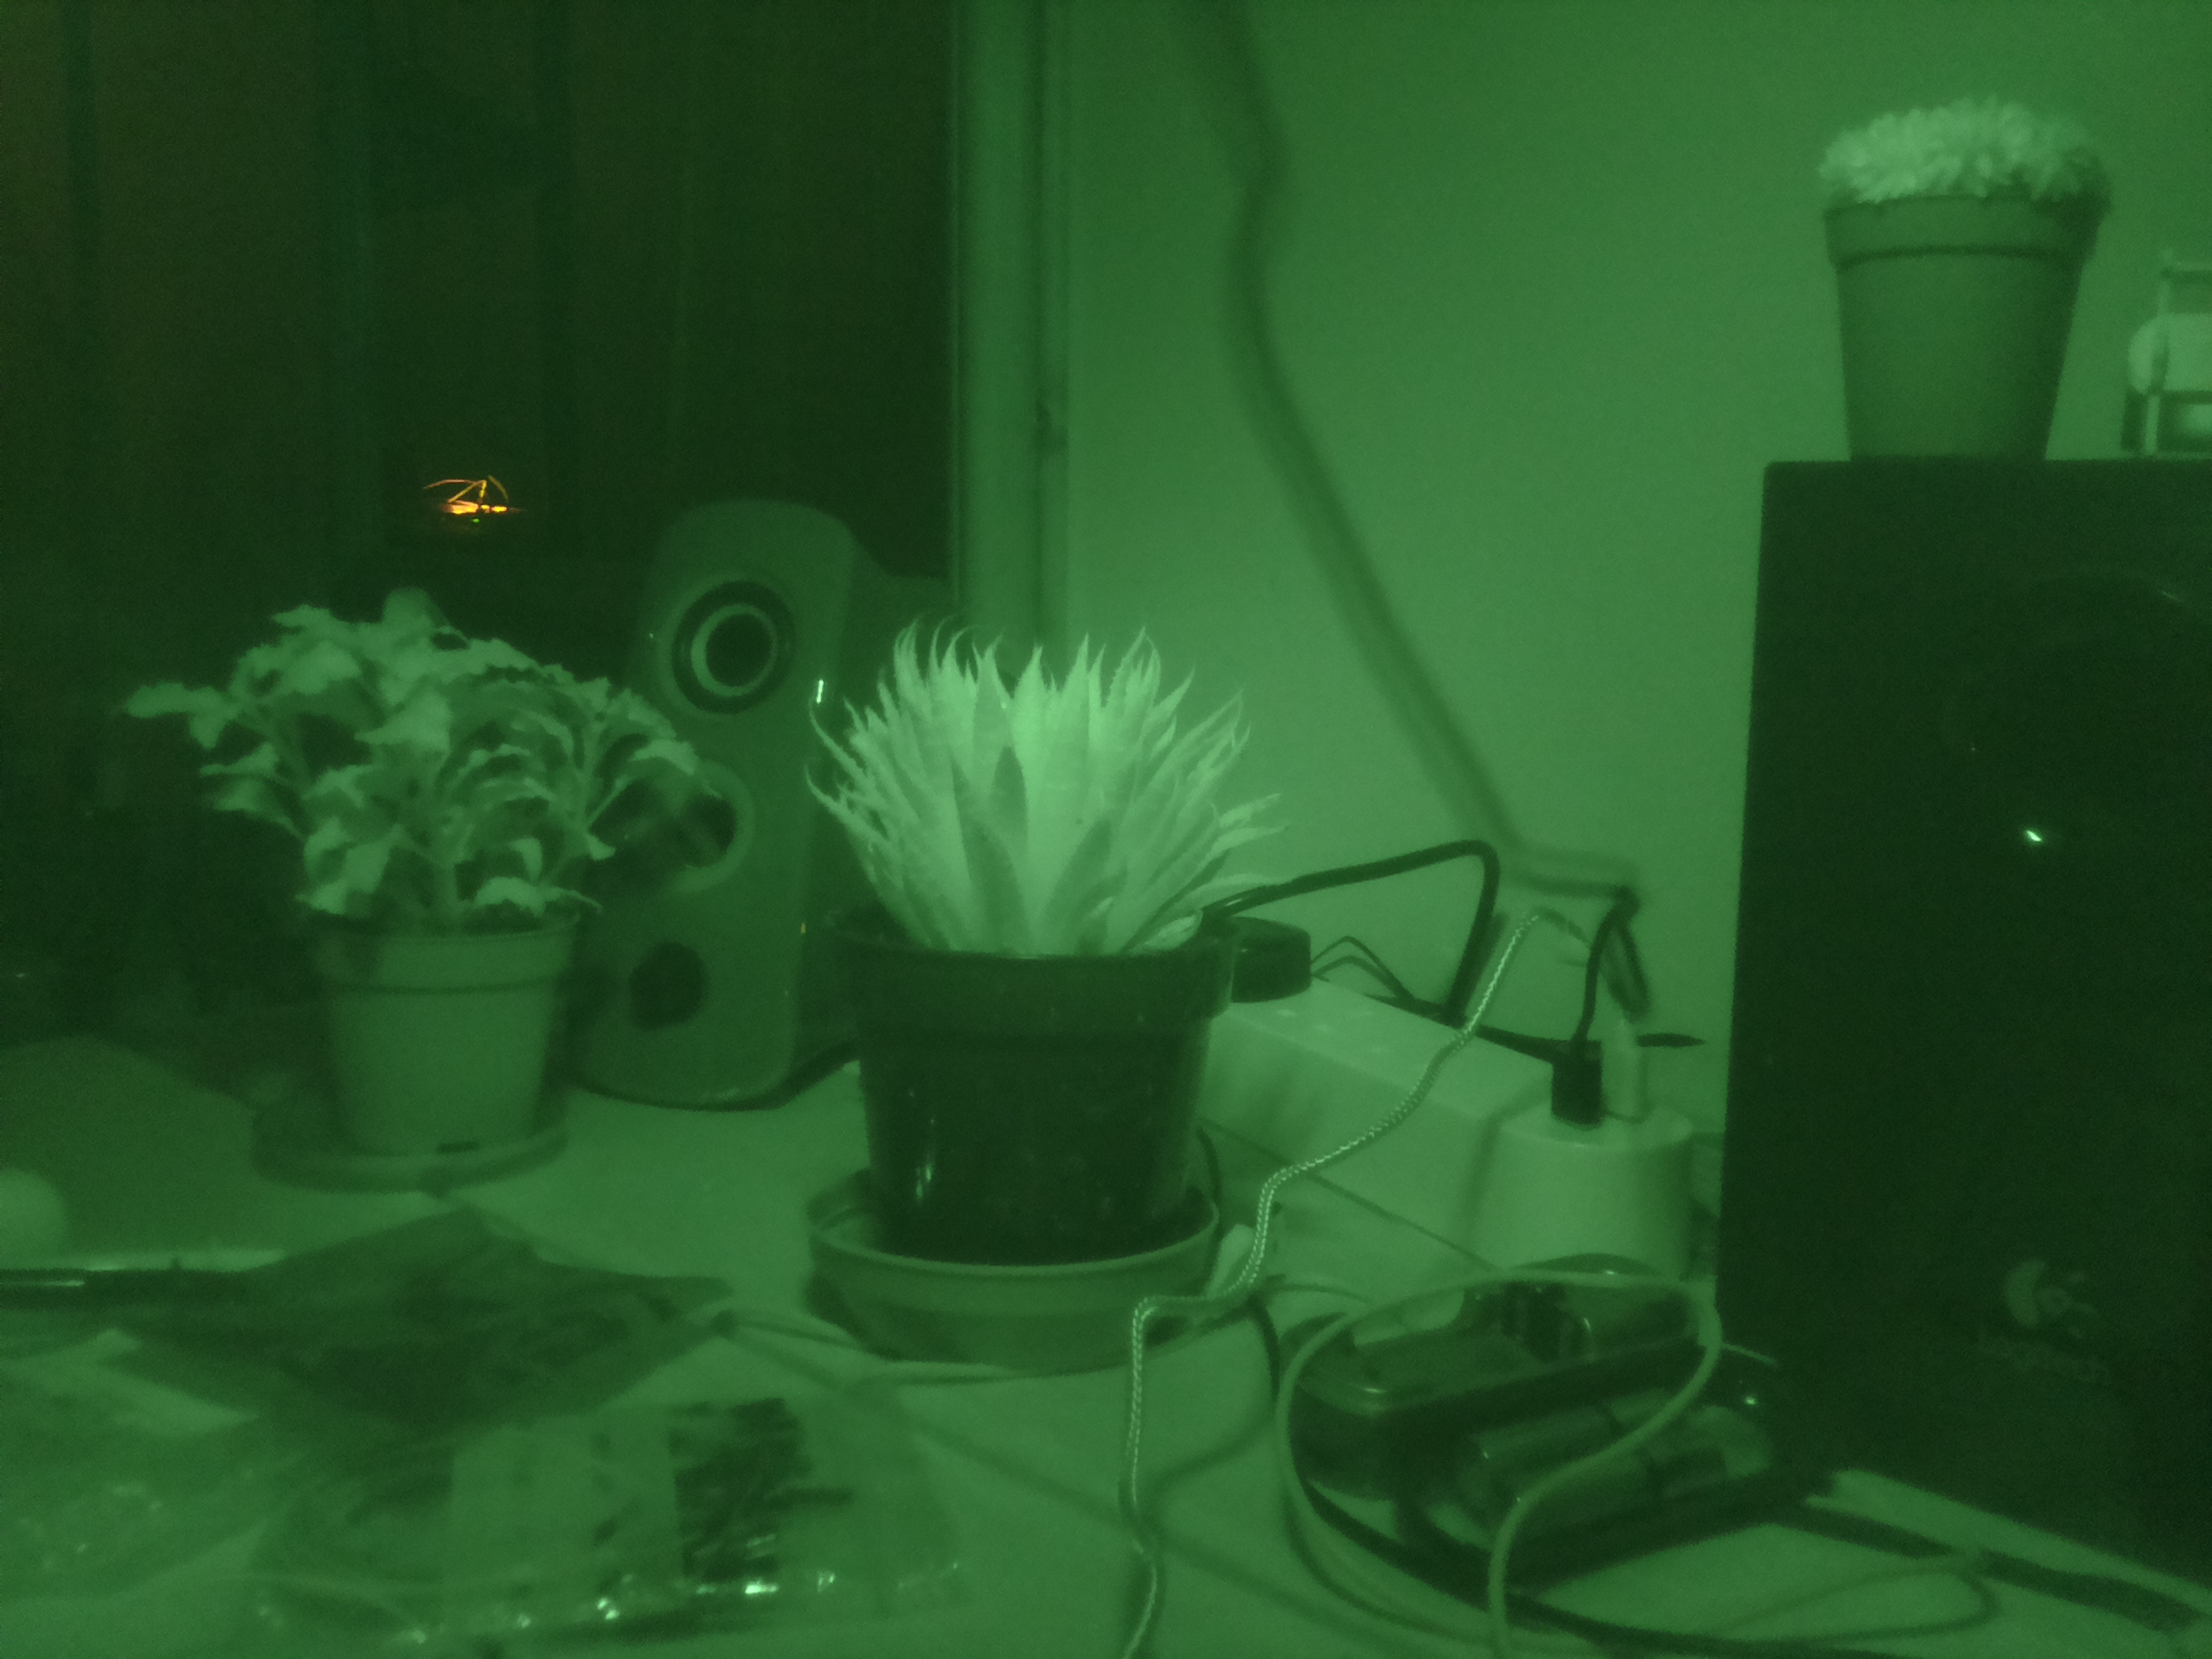
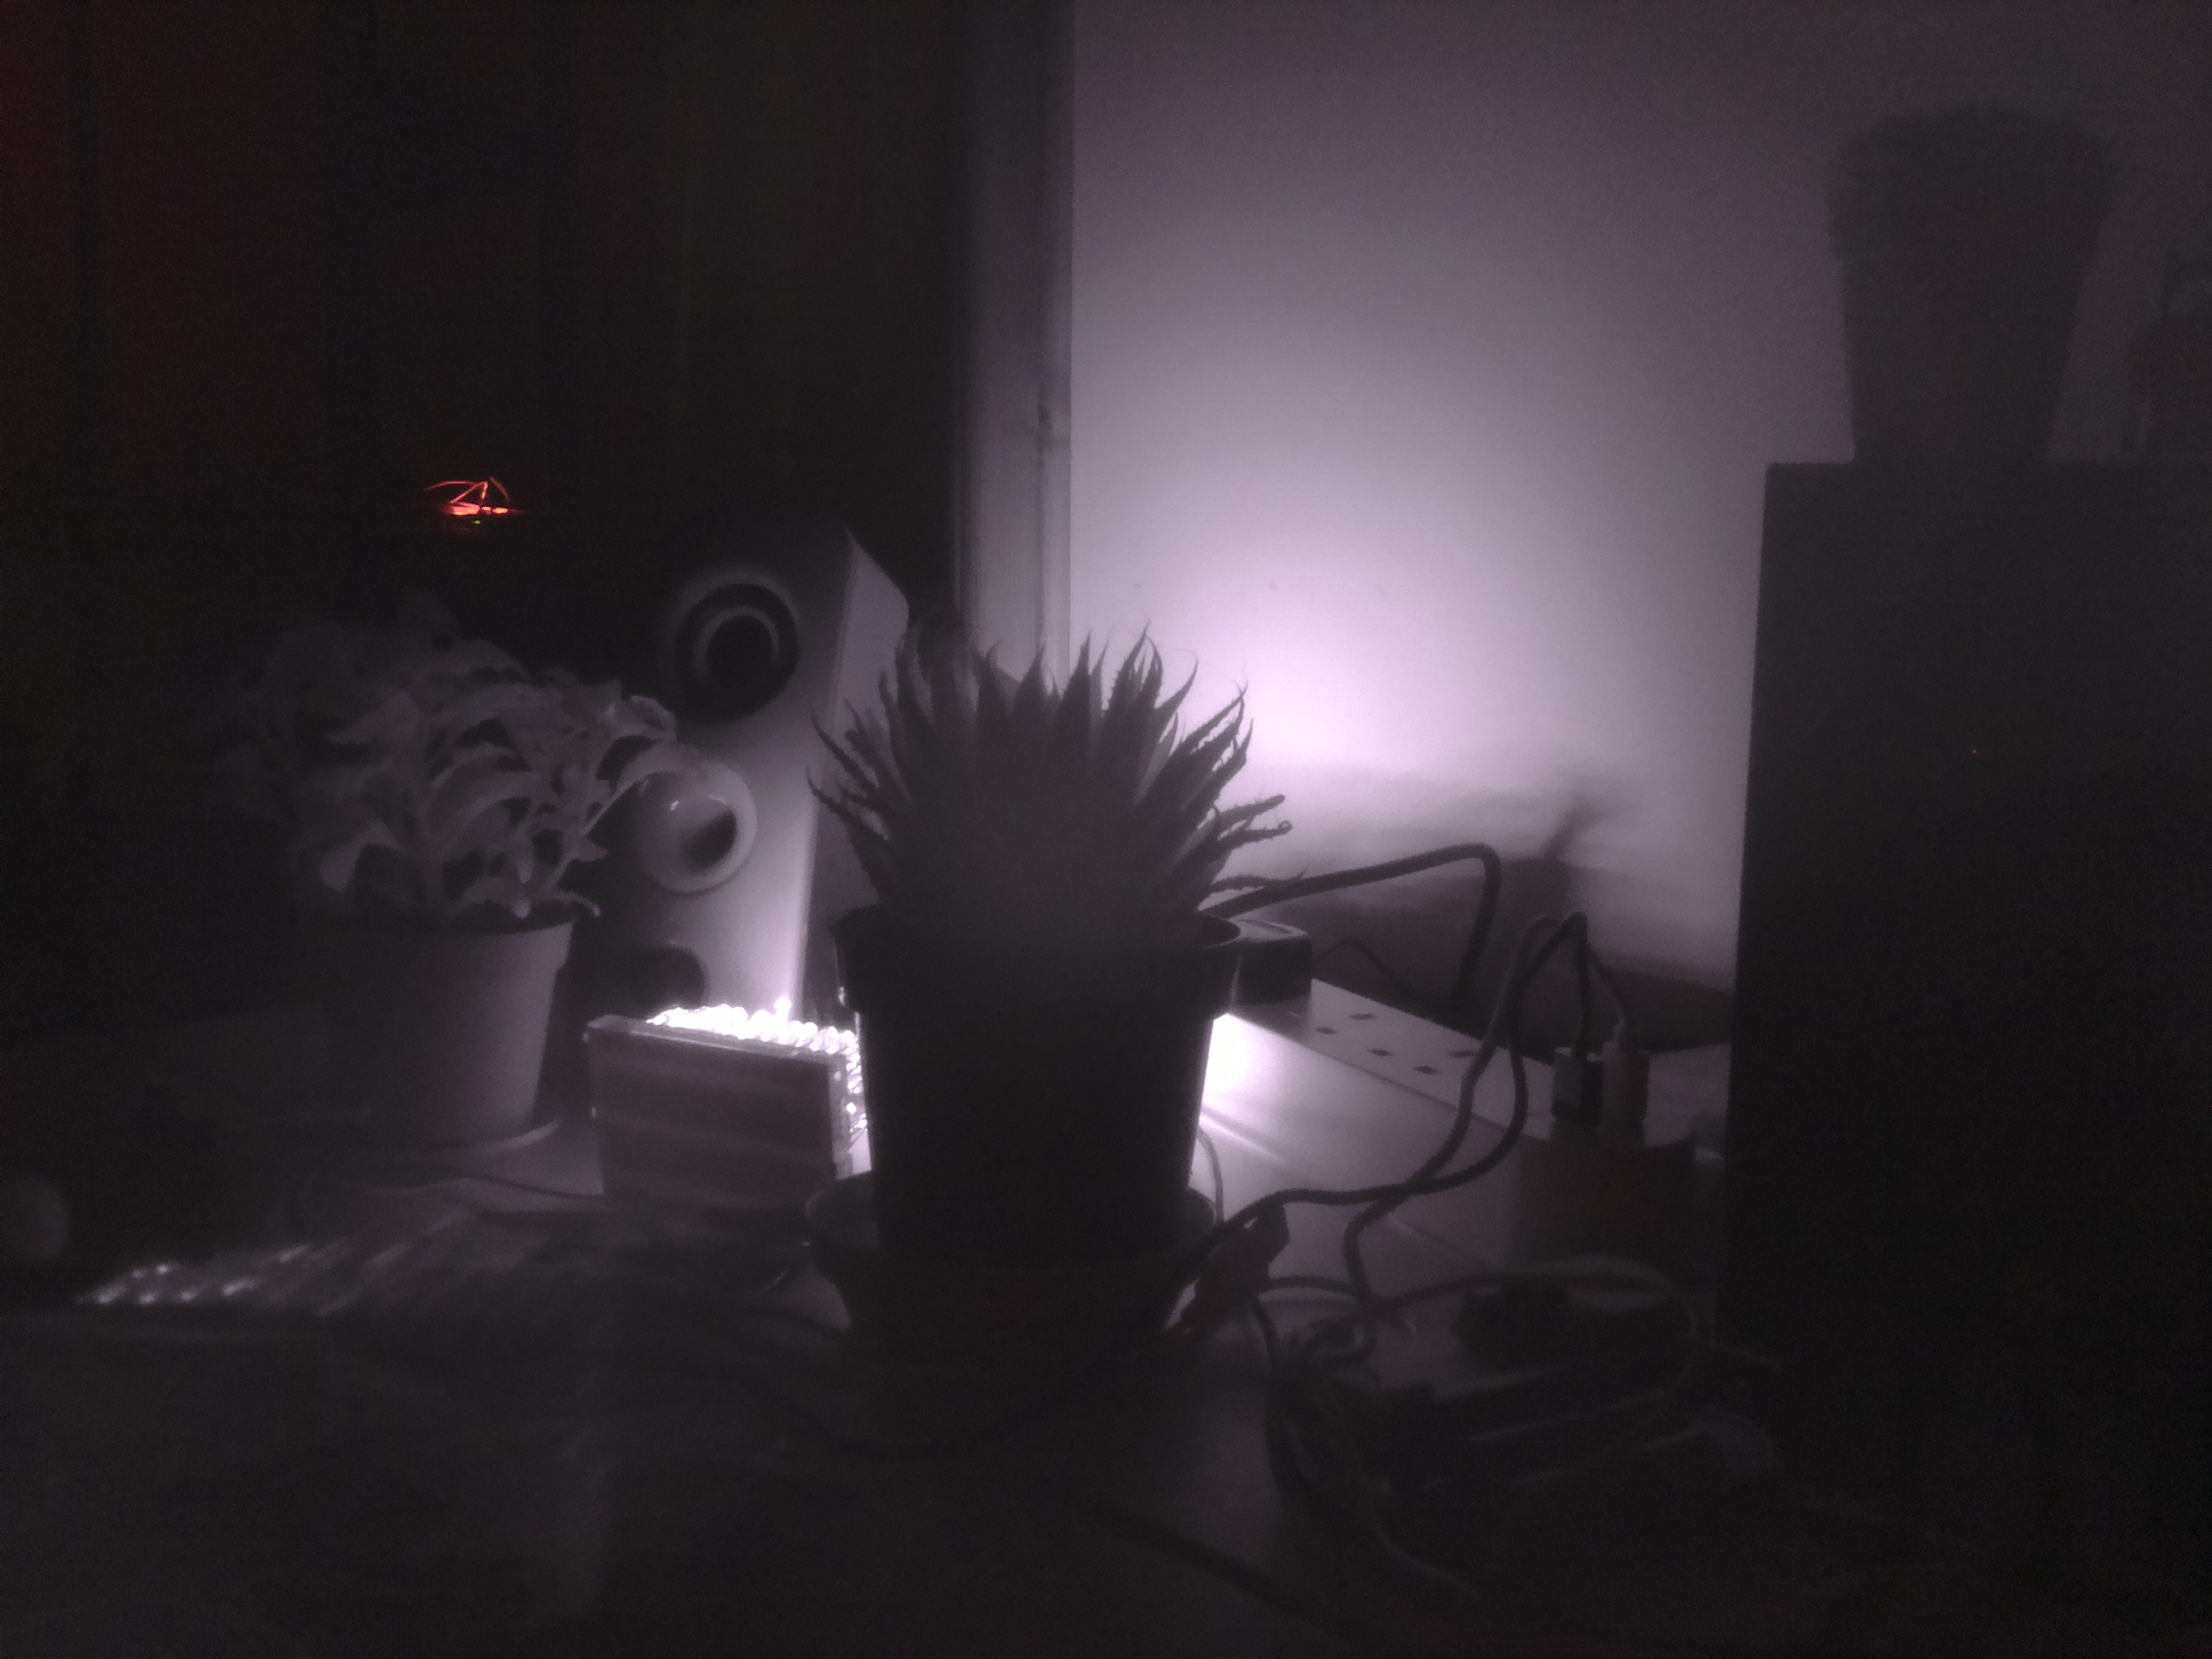
Here's a scene: the first with natural light showing the LEDs on a board, and the next two with infrared illumination. The two infrared scenes appeared almost pitch black to a human eye.
And then I set it up overnight, with a timelapse video of myself sleeping:
I got a Raspberry Pi Zero W and a camera module.
I wanted a timelapse video.
This is how I did it:
This will capture a sequence of images (forever) approximately every minute, with the filename being a unix timestamp.
while true; do raspi-still -o $(date +%s).jpeg ; sleep 60s; done
Leave this to run for as long as you want to collect frames, and you'll end up with a bunch of numerically named files, like this:
$ ls
1504014800.jpeg
1504014866.jpeg
1504014931.jpeg
...
After you've got all the frames you want, use ffmpeg to join the frames together. I do this on a different Linux box (my laptop) but you should be able to do it on the Pi too.
First make a command file listing all the jpeg files:
ls *jpeg | while read a ; do echo file $a; done > e.cmd
Next, feed that command file into ffmpeg to generate a video:
ffmpeg -f concat -i e.cmd -b:v 1500000 -r 24 -c:v libx264 e8.mp4
As a result, the output video should be in e8.mpg which is
in a form suitable for playing with vlc or uploading to YouTube.
I wired in a rugby MSF clock into my raspberry pi, and wrote my own software to interface it to NTP.
Unfortunately I wrote it in winter when they were transmitting approximately GMT. Now its summer time and so they are transmitting British Summer Time not GMT; this is indicated by a bit in the time message. That I ignored. Oops.
Bed time project today was to add that in. Now I've got my stratum 1 server back.
Previously I wired a radio clock via a gertboard into my raspberry pi.
Since then, I figured out that I didn't need the gertboard there, and so now the clock is connected to my other "production" Pi directly onto the GPIO pins.
I've also put the C code I use to interface the radio into ntpd onto github. I needed to copy it from one Pi to the other, and doing it via github means you can download it too now. (yes, I know there are other implementations of MSF decoding around, but I wanted to write the code myself - this is supposed to be fun!)
I've got a couple of Raspberry Pi(e?)s. One I'm using for real server stuff like DNS. The other is for hacking around on. I got a gertboard for it, but hadn't wired anything else up. Then I saw this MSF radio time receiver (for 9 GBP) which is intended to receive 60kHz time broadcasts from the UK National Physical Laboratory.
When I was a teenager, a radio clock was a cool thing that I never had. Then later I got an internet connection, and with it NTP, and so I got geek-time a different way. So I never got an MSF clock until now.
The receiver plugs into the Gertboard (actually it can maybe plug directly in to the Pi's GPIO pins without a Gertboard in the way - I'm not sure) and presents a 1-bit serial signal that is the demodulated 60kHz signal. This is a slightly strange looking signal mostly consisting of 100ms of no carrier, two bits at 100ms each then 700ms of carrier, with 60 seconds of data being enough to transmit the current time.
There was some fiddling soldering to do to get the pins connected - turns out 10y old crocodile clips don't cut it. My father, being better than me at soldering, put those on for me. I cut two of the Gertboard's jumper cables in half so that I'd have wires which connect straight onto Gertboard pins.
The layer above that needs to run in software, at least in my setup.
The first program was a scope program that output * for 1 and . for 0 to the console 80 times a second or so, with a CR every second, to give a line-by-line view of the time. That showed the signal pretty clearly, like this:
.*******************............................................................
.**********.....................................................................
.*********************..........................................................
.**********.....................................................................
.*********......................................................................
.******************.............................................................
.******************.............................................................
.************...................................................................
.***********....................................................................
The short lines are when there's a sync pulse only, and the long lines are when there's a 1-bit immediately following the sync pulse.
The second program used a minute-long circular buffer as a shift register (thanks to Dave_H from the #a&a for that suggestion), and tries to decode time when one end of the buffer looks like the start-of-minute sync pattern. This was able to pretty accurately decode the time. I didn't implement parity checking or other error checking (for example, checking the sync pattern is exactly right) because of that accuracy, which gave trouble later on when I moved the antenna around. Thats something I could implement, and give out some accuracy metric. This took a few hours to code in C (yes, I wrote something in a language that wasn't Haskell). The code is pretty inefficient because it hard polls the GPIO pin. There is some edge triggering available in the Pi's GPIO implementation so I could investigate that. So that ended up as a program which outputs the current time every minute, to the console.
Next, I wanted to connect this with ntpd, so that I could compare the time with other internet time sources, and share the MSF signal with other hosts on the same LAN. ntpd has a facility for connecting "reference clocks" which are sources of time that are not other ntp servers. One of those, the SHMEM driver, communicates with a separate process using a shared memory buffer. So I got to learn about Linux shared memory (indexed using integer keys, I discover, rather than as nodes the file system). For that protocol, basically you stuff the current system clock time and the current received radio time into two fields in that shared memory, every time you get a clock reading. That was a straightforward addition to my second program.
So here's what the hardware setup looks like. The big board is the gertboard. Under it with the big wires is the Pi. The tiny tiny board held in the air by the jumpers is the MSF receiver board, and the big metal rod at the front is the antenna.
And here's what I see in ntpd:
 $ ntpq -pn
     remote           refid      st t when poll reach   delay   offset  jitter
==============================================================================
+2001:8b0:0:53:: 195.66.241.3     2 u   38   64  177   27.872   -4.596   8.680
-2001:8b0:7c:1:2 61.69.233.69     3 u   39   64  177    0.597   -2.285   8.710
+2001:8b0:7c:1:b 90.155.53.93     3 u   37   64  177    1.000   -3.868   8.395
*127.127.28.2    .MSF.            0 l   44   64   17    0.000  -23.730   6.885
where NTP has recently synced to the MSF driver (with fake IP address 127.127.28.2). Its about 20ms different from the network-connected NTP servers (see the offest column). Its difficult to know how much of that is from NTP over-the-network inaccuracies and how much is from my code, but I suspect the bulk of it is from my MSF code - my polling just isn't accurate enough at the moment, and my parsing has some weird time alignment stuff in it.
All in all, good fun and blinkenlights!
p.s. you're welcome to point your own ntp servers at this for fun. Add server tyne.cqx.ltd.uk to your /etc/ntpd.conf
p.p.s. is it sad that I can decode those octal reachability fields in my head.
It sounds like a common cause of problems sticking peripherals onto a Raspberry Pi come from unsufficient power supply.
They have a USB port for feeding power in, and I think that encourages people (including myself) to use any old USB compatible supply (even though they explicitly tell you to not do that in the docs...). I tried mine first feeding from my laptop and then from my mifi power supply.
That mifi supply seems to work for regular usage but when I start plugging things into USB it gets all wanky. So I measured the voltage with my trusty old multimeter - it seems to be down around 4.6v, (varying by about 0.1v depending on what I have wired in). That's well below the 4.75v minimum that apparently I should be seeing.
Off the the RS online shop to buy a grown up power supply then...
I just got my Raspberry Pi, left on doorstep from Farnell in a package labelled "tshirt"; indeed inside the package was a (free) element14/pi tshirt, and wrapped inside that was my actual raspberry pi. Its taken a while to arrive (like most people's) - it was ordered on the 9th of May.
The first afternoon I spent playing with it came with an excited nostalgic feeling to my teenage years, scrabbling to put random pieces of hardware together scrounged around the house in order to get a working system: a keyboard off one host, a usb hub stolen from someone, a long ethernet wire borrowed from someone because the TV is in one room and the ethernet ports are in another. It was made more nostalgic because my best friend from secondary school who used to be my main partner in this kind of activity turned up to have a play too.
I fairly easily got the example debian distribution downloaded (my first linux distro downloaded by bittorrent) and running on a 4gb SD card; and once that was in place, it was easily to get a browser up and watch the bunnycam.
After giving up on getting flash running in order to get BBC iPlayer, I discovered get-iplayer (on the way getting annoyed by this blog post by a BBC dude about how people shouldn't use 3rd party clients). I can just about play BBC radio audio at the same time as the bunny webcam is streaming video. But it didn't seem to have enough power to decode an iplayer video stream instead of the bunny webcam, which was a bit disappointing.
There seem to be a few funny presumably hardware related problems: the device doesn't reboot at all, and sometimes when I boot, sound does not work at all. I haven't had time or inclination to track these down at all. Most concerning for me is that the experience of different devices seems slightly different - for example, other people seem to be able to reboot just fine.
After downloading the recommended Debian distro, I discovered that there was a beta release of a much more recent version, wheezy. This was a lot smoother experience than the recommended distro - it resized the image automatically to fill the whole 4g disk space, and just seemed more polished. Either way, those distributions are debian based, so the amazingness (if you're being nostalgic about 80s/90s era hacking) of apt comes into play to get a big range of software installed.
It was cool that the wheezy distribution came with Scratch - a visual programming language that is sort of a year-2012 version of Logo. (That's cool - one of the first things I thought about when I heard of the goals of the raspberry pi was to think: why don't you get people programming scratch instead?)
Something interesting I discovered was that the ARM architecture does floating point emulations completely differently to intel: there are different calling conventions for software floating point and hardware floating point, and it seems that all the packages in your distro need recompiling to make use of hardware floating point, if they were originally built for software floating point. I'll have a play with that later.
The GPIO port had pins soldered on, which i wasn't expecting. I'm not sure what to use those for. I've had a user port on a computer before, but never used them much - just for flashing LEDs and making model trains drive around. maybe some geeky weather station thing?
So what do you need to get started, in addition to the pi? Well a keyboard and video (composite or HDMI) and a power supply - I'm using the USB-based power supply I stole from my mifi. Probably you'd like a mouse and an ethernet connection.
If I get up to anything cool, I'll write about it on this blog, no doubt.
